
Jet Ski Intake Grate Inspection: Damage and Safe Replacement
Learn how to conduct a thorough jet ski intake grate inspection, spot dangerous wear, and complete safe replacements to protect your pump system.
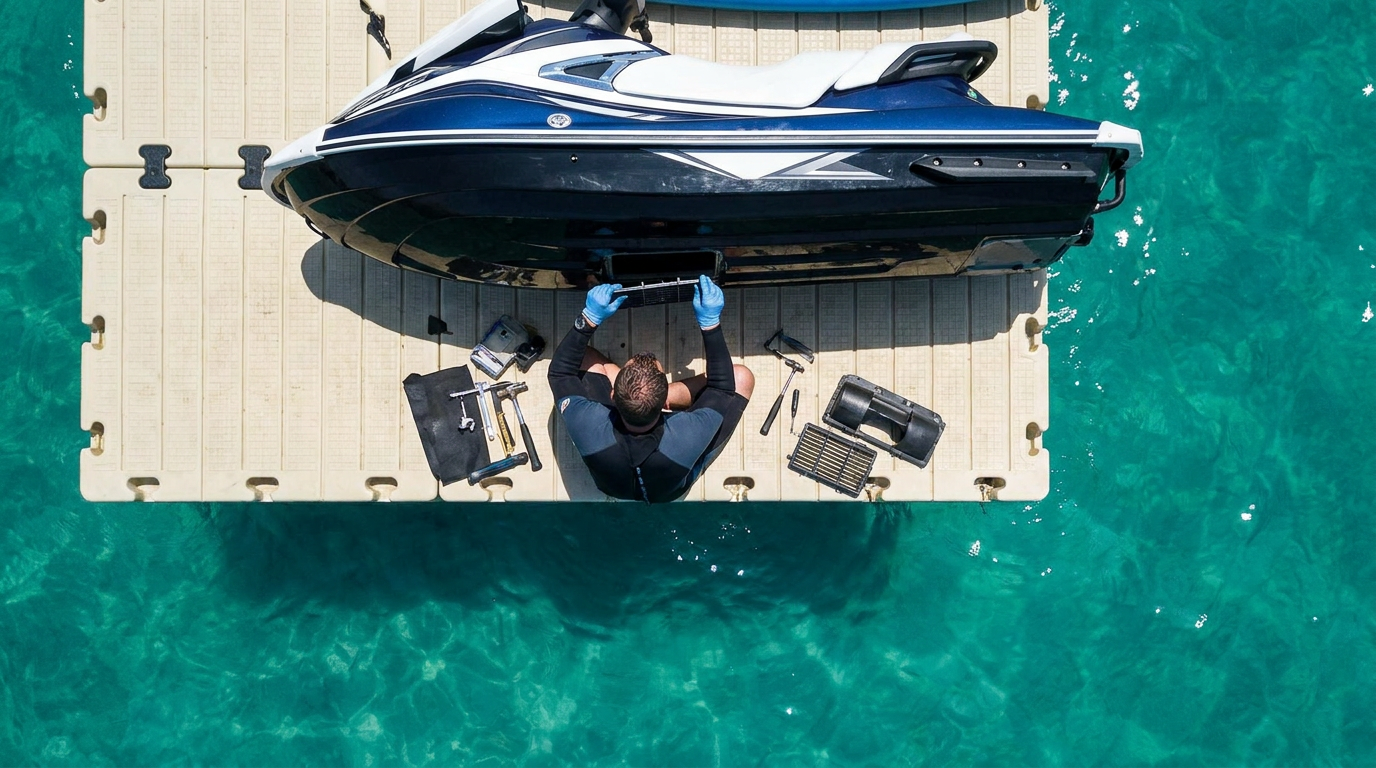
Jet Ski Intake Grate Inspection: Damage and Safe Replacement
Performing a routine jet ski intake grate inspection is one of the most critical maintenance steps you can take to protect your personal watercraft from catastrophic pump failure. Located right beneath the hull, the intake grate serves as the primary barrier between open water hazards and your high-speed jet pump impeller. Whether you cruise coastal bays or carve across inland reservoirs, submerged debris constantly tests the strength of this vital component. In this expert guide, you will learn how to identify hidden fractures, evaluate hardware condition, and execute a safe replacement in your home garage.
Understanding intake mechanics ensures that every minute on the water remains thrilling and trouble-free. We will break down essential inspection points, explore common damage mechanisms, and outline step-by-step removal and installation instructions. If you plan to upgrade your vessel or maintain peak performance through the 2026 riding season, mastering intake grate upkeep will save you thousands of dollars in mechanical repairs.
Why Regular Jet Ski Intake Grate Inspection Protects Your Jet Pump
Your watercraft operates by vacuuming immense volumes of water through the intake grate and feeding that flow directly into the pump housing. When the grate suffers damage, water dynamics change instantly. Missing tines or warped scoop angles cause turbulent airflow and disrupted flow channels, which leads to severe cavitation. Cavitation occurs when vapor bubbles form and violently collapse against the impeller blades, pitting the metal and killing acceleration.
A thorough jet ski intake grate inspection also safeguards internal propulsion components against floating wood, fishing lines, gravel, and loose rocks. When a grate tine breaks entirely, open gaps allow destructive foreign objects to reach the spinning impeller at 7,000 RPM. This catastrophic intrusion can bend driveshafts, crack wear rings, and shatter pump stators within milliseconds. Riders enjoying high-output models like modern Yamaha WaveRunners know that even minor intake turbulence substantially reduces hook-up and top-end stability.
Common Causes of Intake Grate Wear and Structural Damage
Intake grates endure continuous hydraulic load, vibration, and abrasive contact with shallow lake bottoms. Identifying the core causes of deterioration helps you prevent damage before it compromises your hull.
Shallow water operation remains the leading culprit behind physical grate fractures. Launching or idling in water under three feet deep creates a high-pressure vortex that draws pebbles straight off the riverbed. Enthusiasts exploring shallow hotspots often encounter these hazards when browsing jet skis for sale in Texas or lakefront ramps featuring jet skis for sale in Michigan. Hitting submerged timber, floating dock floats, or sandbars will bend aluminum fins and stress the fiberglass mounting bosses embedded in your bottom deck.
Electrolysis and saltwater corrosion also degrade mounting hardware over time. When dissimilar metals interact in brackish water, stainless steel fasteners can corrode surrounding aluminum threads or seize solid. If corrosion breaks the structural bond between the fasteners and the hull inserts, the intake grate can detach during high-speed runs, creating disastrous hull breaches.
Step-by-Step Guide to Performing a Jet Ski Intake Grate Inspection
You do not need a professional service bay to complete an accurate evaluation. You can inspect the underside of your craft while it rests securely on its bunk trailer or workshop service stand.
Visual Checks for Cracks and Bent Tines
Begin by securing the craft and disconnecting the battery ground cable to eliminate accidental ignition hazards. Clean away any dried weeds, lake slime, or mud caked inside the intake tunnel using fresh water and a nylon bristle brush. Shine a focused LED inspection flashlight into the cavity from both front and rear angles.
Check every single bar and crossmember for hairline stress fractures, micro-cracks, or twisted foil profiles. Tines that bend upward restrict volume, while tines bent downward cause drag and pull the nose erratic under hard cornering. Look closely at the trailing edges where tines merge into the mounting perimeter, as these structural junctions absorb the highest vibration loads.
Hardware Integrity and Thread Condition
Next, examine the mounting bolts located at the forward edge and rear trailing corners of the grate. Every factory bolt must be completely tight and free of rounding or rust scale. Wiggle the entire grate firmly with two hands. Any visible flex, clunking sensation, or shifting indicates sheared bolts, stripped hull inserts, or deteriorated marine silicone sealant.
Use this convenient checklist whenever you conduct your monthly jet ski intake grate inspection:
- Inspect all horizontal and vertical tines for stress cracks, missing chunks, and bends.
- Verify that every mounting bolt retains proper torque without loose backing inserts.
- Check the intake tunnel silicone bead for peeling, voids, and water leakage.
- Ensure the ride plate transition is flush without exposed edges catching water.
- Examine the internal drive shaft tunnel for wedged stones or tangled fishing line.
How to Safely Replace a Damaged PWC Intake Grate
If your jet ski intake grate inspection reveals deep structural cracks or missing bars, replacing the unit immediately is mandatory. Riding with compromised intake parts poses immense risks to your vessel and your personal safety.
Start by breaking loose the retaining bolts using a six-point socket wrench. Never use an impact gun on stubborn hull bolts, as excessive torque will spin the brass threaded inserts molded inside the fiberglass deck. If threadlocker locks the bolt tight, apply gentle localized heat with a heat gun to soften the compound without melting surrounding resin. Once you remove the bolts, slice through the old polyurethane sealant using a flexible plastic putty knife. Carefully pry down the damaged grate, ensuring you never gouge gelcoat around the pump tunnel perimeter.
Thoroughly clean the mounting recesses by removing old silicone residue with isopropyl alcohol or mineral spirits. Wipe the area dry. Test-fit your replacement grate to verify that bolt holes align perfectly before applying fresh adhesive. Coat the clean contact surfaces with an ultra-durable marine polyurethane sealant like 3M 5200 or 4200. Apply medium-strength blue threadlocker to bolt threads, seat the grate smoothly, and torque all fasteners evenly to manufacturer specifications, which normally range between 7 and 11 foot-pounds. Allow the sealant to cure completely for at least 24 to 48 hours before testing in the water.
Completing this clean repair protects your craft value. If you ever decide to sell your jet ski, providing proof of pristine pump components builds immediate buyer confidence. Shoppers inspecting newly listed jet skis always check the pump tunnel first to verify previous owner diligence.
Upgrading to Aftermarket Top-Loader Grates in 2026
Replacing a factory grate provides a great opportunity to explore aftermarket performance enhancements. Performance riders navigating rough water frequently switch to aftermarket top-loader grates. These units feature extended center scoops and modified foil designs that pull extra water into the top section of the jet pump.
Top-loader grates virtually eliminate cavitation when jumping ocean swells or accelerating hard out of tight turns. However, high-bite designs generate minor hydro-drag that can reduce top speed by one to two miles per hour in glassy water conditions. If you ride choppy lakes like those seen among jet skis for sale in Nevada, rough-water hook-up offers far more recreational fun than fractional top-end figures. You can examine popular performance models by checking our curated featured jet ski listings, or plan your next performance upgrade using our handy jet ski financing calculator.
Conclusion and Call to Action
A reliable jet ski intake grate inspection requires only fifteen minutes of your time, yet it serves as the ultimate safeguard for your entire propulsion assembly. By catching hairline stress fractures, bent bars, and deteriorated hardware before launching, you preserve top-tier performance and prevent expensive tow-ins. Inspect your intake tunnel before every major trip, install quality replacement components using correct sealants, and hit the waves with full confidence.
Frequently Asked Questions
Can a broken intake grate destroy my jet ski pump?
Yes, a fractured intake grate can cause total pump failure. When grate tines break, fragments can shoot into the spinning impeller, destroying blades, bending driveshafts, and gouging pump wear rings within a fraction of a second.
What sealant should I use when reinstalling an intake grate?
Marine-grade polyurethane adhesive sealants like 3M 4200 or 5200 are the industry standard for intake grate installation. These compounds resist fuels, vibration, and water pressure while preventing water from penetrating bare hull fiberglass.
How often should an intake grate inspection be performed?
You should conduct a visual jet ski intake grate inspection before every weekend ride and execute a thorough tactile hardware check every twenty-five operating hours or after any shallow-water grounding incident.
Will an aftermarket top loader intake grate decrease top speed?
In calm, glassy water, a top loader grate can decrease top speed by roughly one to two miles per hour due to scoop drag. In choppy conditions, however, it delivers faster overall performance by keeping the jet pump fully loaded.
Ready to buy or sell? Explore the jet ski marketplace, browse jet skis for sale, or jet ski valuation calculator at Jet Sports Trader.
Related Articles
Jet Ski Bilge Pumps: Testing and Water Intrusion Checks
Learn how to conduct jet ski bilge pump testing and diagnose dangerous hull water intrusion to keep your engine bay dry and protected all season long.
DIY Jet Ski Hydro-Turf Installation: Step-by-Step Guide
Ready to upgrade your PWC? Our step-by-step guide to DIY jet ski hydro-turf installation will help you improve grip, comfort, and style with professional results.

Optimizing Jet Ski Handling: Adjusting Ride Plates & Sponsons
Unlock your PWC's full potential. Our guide to jet ski handling adjustments for ride plates and sponsons will help you master cornering and achieve ultimate stability on the water.
Ready to Find Your Perfect Jet Ski?
Browse thousands of listings from trusted dealers nationwide